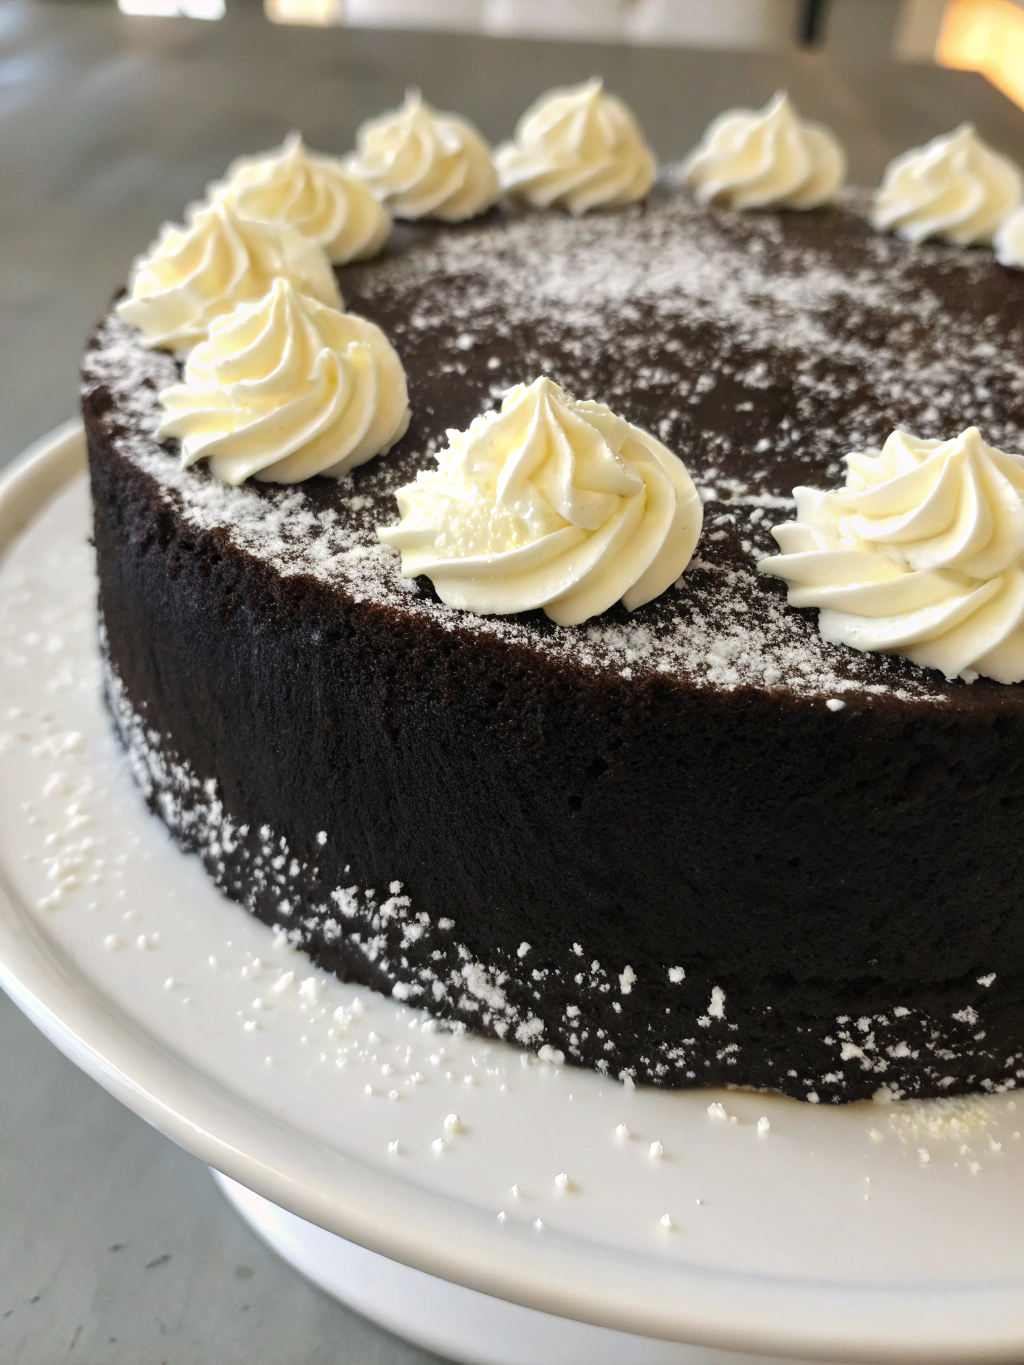
Black Velvet Cake
A decadent twist on the traditional red velvet, this Black Velvet Cake features a luxuriously dark chocolate cake with velvety smooth cream cheese frosting. The perfect showstopper dessert for special occasions or whenever you crave something uniquely delicious.
Easy Black Velvet Cake Recipe
There’s something mysteriously elegant about a Black Velvet Cake that captures attention the moment it appears on the table. Unlike its crimson cousin, the Black Velvet Cake delivers a more intense chocolate experience with its dramatically dark crumb, achieved through rich cocoa and activated charcoal for that stunning ebony hue. Dating back to the early 2010s, this modern classic has become increasingly popular for Halloween gatherings, gothic-themed parties, and elegant dinner affairs where a statement dessert is required.
THIS RECIPE:
- Delivers a moist, tender cake with deep chocolate flavor
- Features the perfect balance of sweetness with subtle tangy notes
- Requires simple pantry ingredients plus activated food-grade charcoal
- Creates a stunning presentation with minimal decorating skills
| Recipe Details | Information |
|---|---|
| Prep Time | 30 minutes |
| Cook Time | 35 minutes |
| Cooling Time | 1 hour |
| Total Time | 2 hours 5 minutes |
| Servings | 12 slices |
| Yield | One 3-layer 8-inch cake |
Don’t be intimidated by the dramatic appearance—this Black Velvet Cake recipe is surprisingly straightforward to make. The batter comes together quickly, and the cream cheese frosting is virtually foolproof. Even beginning bakers can achieve impressive results with this recipe, making it perfect for those special occasions when you want to wow your guests without spending hours in the kitchen.
Ingredients for Black Velvet Cake

The quality of ingredients makes all the difference in creating a truly exceptional Black Velvet Cake. Opt for premium cocoa powder and fresh dairy products to ensure the best flavor and texture in your finished cake.
For the Black Velvet Cake Layers:
- 2½ cups all-purpose flour
- 2 cups granulated sugar
- 1 cup unsalted butter, softened
- 1 cup buttermilk, room temperature
- ¾ cup high-quality dark cocoa powder
- 2 large eggs, room temperature
- 1-2 teaspoons food-grade activated charcoal powder
- 2 teaspoons vanilla extract
- 1 teaspoon baking soda
- 1 teaspoon baking powder
- ½ teaspoon salt
- 1 tablespoon white vinegar
- 2 tablespoons strong brewed coffee (optional, enhances chocolate flavor)
For the Cream Cheese Frosting:
- 16 ounces cream cheese, softened
- ½ cup unsalted butter, softened
- 4 cups powdered sugar, sifted
- 2 teaspoons vanilla extract
- Pinch of salt
For Decoration (Optional):
- Black and silver sprinkles
- Edible silver leaf
- Fresh berries
| Ingredient Category | Recommended Quantity | Quality Tips |
|---|---|---|
| Cocoa Powder | ¾ cup | Use Dutch-processed for deeper color and smoother flavor |
| Activated Charcoal | 1-2 teaspoons | Must be food-grade; adjust amount for desired darkness |
| Buttermilk | 1 cup | Real buttermilk is best, but can substitute with milk + 1 tbsp vinegar |
| Cream Cheese | 16 ounces | Full-fat, brick-style delivers the best frosting texture |
How to Make Black Velvet Cake
Creating a perfect Black Velvet Cake requires attention to detail and proper technique, but the process is straightforward when broken down into manageable steps. The key lies in properly incorporating the charcoal powder and ensuring your cake layers bake evenly for that signature velvet texture.
Preparing the Cake Batter:
Preheat your oven to 350°F (175°C). Grease and line three 8-inch round cake pans with parchment paper.
In a medium bowl, whisk together the flour, cocoa powder, activated charcoal, baking powder, baking soda, and salt. Set aside.
In a large mixing bowl, cream the softened butter and sugar with an electric mixer on medium-high speed until light and fluffy, about 3-4 minutes. This incorporation of air is crucial for a tender crumb.
Add eggs one at a time, beating well after each addition. Mix in the vanilla extract.
In a small bowl, combine the buttermilk, vinegar, and coffee (if using).
Gradually add the dry ingredients to the butter mixture, alternating with the buttermilk mixture, beginning and ending with the dry ingredients (three additions of dry, two of liquid). Mix on low speed just until combined after each addition.
Divide the batter evenly between the three prepared cake pans, smoothing the tops with a spatula.
Bake in the preheated oven for 25-30 minutes, or until a toothpick inserted into the center comes out clean or with a few moist crumbs.
Allow the cakes to cool in the pans for 10 minutes, then remove them from the pans and transfer to a wire rack to cool completely before frosting.
For the Cream Cheese Frosting:
In a large bowl, beat the softened cream cheese and butter together until smooth and creamy, about 2-3 minutes.
Gradually add the sifted powdered sugar, one cup at a time, beating well after each addition.
Mix in the vanilla extract and pinch of salt, then continue beating until the frosting is light and fluffy, about 3-4 minutes.
Assembling the Cake:
Once the cake layers are completely cool, place one layer on a cake stand or serving plate.
Spread about 1 cup of frosting evenly over the top of the layer.
Place the second cake layer on top and repeat with another cup of frosting.
Add the third cake layer and cover the top and sides of the cake with the remaining frosting.
For the smoothest finish, use a bench scraper or offset spatula to create an even layer of frosting around the sides.
Decorate as desired with optional sprinkles, edible silver leaf, or fresh berries.
Allow the frosted cake to chill in the refrigerator for at least 30 minutes before serving to set the frosting.
Tips for Making Black Velvet Cake
Expert Advice for Perfect Results:
- Room Temperature Ingredients: Ensure all cold ingredients (eggs, buttermilk, butter) are at room temperature for better incorporation and a smoother batter.
- Measuring Charcoal: Start with less activated charcoal and adjust to achieve your desired color depth. Remember that a little goes a long way!
- Don’t Overmix: After adding the dry ingredients, mix just until combined to avoid developing too much gluten, which can make the cake tough.
- Even Cake Layers: Use a digital kitchen scale to divide the batter equally between pans for uniform layers.
| Technique | Recommendation | Reason |
|---|---|---|
| Mixing Method | Low speed after adding dry ingredients | Prevents overmixing and tough cake texture |
| Charcoal Addition | Mix thoroughly with dry ingredients first | Ensures even color distribution without streaks |
| Cake Testing | Toothpick should have a few moist crumbs | Ensures moist cake without underbaking |
| Cooling | Complete cooling before frosting | Prevents melting frosting and sliding layers |
Pro tip: Add 1-2 tablespoons of strong coffee to enhance the chocolate flavor without making the cake taste like coffee. The coffee simply deepens the chocolate notes.
Make-Ahead Instructions
Preparing components of your Black Velvet Cake in advance makes the assembly process much more manageable, especially when preparing for special events.
The unfrosted cake layers can be made up to 2 days in advance. Once completely cooled, wrap each layer individually in plastic wrap and store at room temperature. For longer storage, place the wrapped layers in airtight containers or zip-top bags.
Cream cheese frosting can be prepared up to 3 days ahead and stored in an airtight container in the refrigerator. Before using, let it sit at room temperature for about 30 minutes, then re-whip with an electric mixer to restore its fluffy texture.
The fully assembled cake can be made 1 day in advance. Store covered in the refrigerator, then bring to room temperature for about 30 minutes before serving for the best flavor and texture.
Pro tip: If making the cake layers ahead of time, you can level and trim them while still cold from the refrigerator—they’re much easier to work with and create fewer crumbs.
Storing Leftovers
Proper storage is essential to maintain the freshness and quality of your Black Velvet Cake after serving.
Due to the cream cheese frosting, leftover Black Velvet Cake should be stored in an airtight container in the refrigerator. The cake will stay fresh for up to 5 days when properly stored.
For the best flavor and texture experience, allow refrigerated cake slices to sit at room temperature for about 20-30 minutes before serving. This takes the chill off and allows the cake to return to its moist, tender state.
If you’ve cut into the cake, press plastic wrap against the exposed cake surface before covering to prevent it from drying out in the refrigerator.
Freezing Black Velvet Cake
Freezing is an excellent option for extending the life of your Black Velvet Cake beyond a few days.
To freeze unfrosted cake layers, wrap each one tightly in plastic wrap, followed by a layer of aluminum foil. Label with the date and freeze for up to 3 months.
For freezing a frosted Black Velvet Cake, place the cake in the freezer uncovered until the frosting hardens (about 1 hour). Then wrap the cake in plastic wrap followed by aluminum foil. Freeze for up to 2 months.
When ready to enjoy, thaw frozen unfrosted layers at room temperature for about 1-2 hours. For a whole frosted cake, thaw overnight in the refrigerator, then bring to room temperature for about 30 minutes before serving.
Pro tip: Individual cake slices freeze beautifully! Wrap each slice separately and place in a freezer container. This way, you can enjoy a piece of Black Velvet Cake whenever the craving strikes.
Serving Suggestions
Elevate your Black Velvet Cake experience with these complementary serving ideas that enhance its rich flavor profile.
A simple dusting of powdered sugar creates a striking contrast against the dark cake. For more glamour, add edible silver leaf or dragées for a celestial-inspired decoration that enhances the dramatic presentation.
Fresh berries—particularly raspberries or strawberries—provide a bright, acidic counterpoint to the rich cake. Consider serving each slice with a small berry compote on the side.
For beverage pairings, this cake is exceptional with:
- A bold red wine like Cabernet Sauvignon
- Strong black coffee or espresso
- Milk (particularly for younger guests)
- Port or dessert wine for special occasions
Serve Black Velvet Cake at room temperature for the most balanced flavor profile and the perfect melt-in-your-mouth texture. If the cake has been refrigerated, allow it to sit out for about 30 minutes before serving.
FAQ
Can I make Black Velvet Cake without activated charcoal?
Yes, you can make this cake without activated charcoal by increasing the cocoa powder to 1 cup and adding black food coloring. However, the activated charcoal creates the most authentic black color without affecting the flavor significantly.
Is activated charcoal safe to eat?
Food-grade activated charcoal is generally considered safe for occasional consumption in small amounts. However, it can interfere with certain medications, so consult with a healthcare provider if you have concerns. Also, it’s best to avoid serving to pregnant women, children, or those with certain health conditions.
Can I substitute the buttermilk in this recipe?
Yes! Make a quick buttermilk substitute by adding 1 tablespoon of white vinegar or lemon juice to 1 cup of regular milk. Let it stand for 5 minutes before using. Alternatively, plain yogurt thinned with a little milk works well too.
Why did my cake turn out gray instead of black?
This usually happens when not enough activated charcoal or cocoa powder is used. Ensure you’re using Dutch-processed cocoa for a darker base, and gradually increase the charcoal (up to 2 teaspoons) to achieve the desired black color.
How can I make this cake gluten-free?
Substitute the all-purpose flour with a 1:1 gluten-free flour blend that contains xanthan gum. Bob’s Red Mill or King Arthur Measure for Measure work particularly well in this recipe, maintaining the cake’s moist, tender crumb.