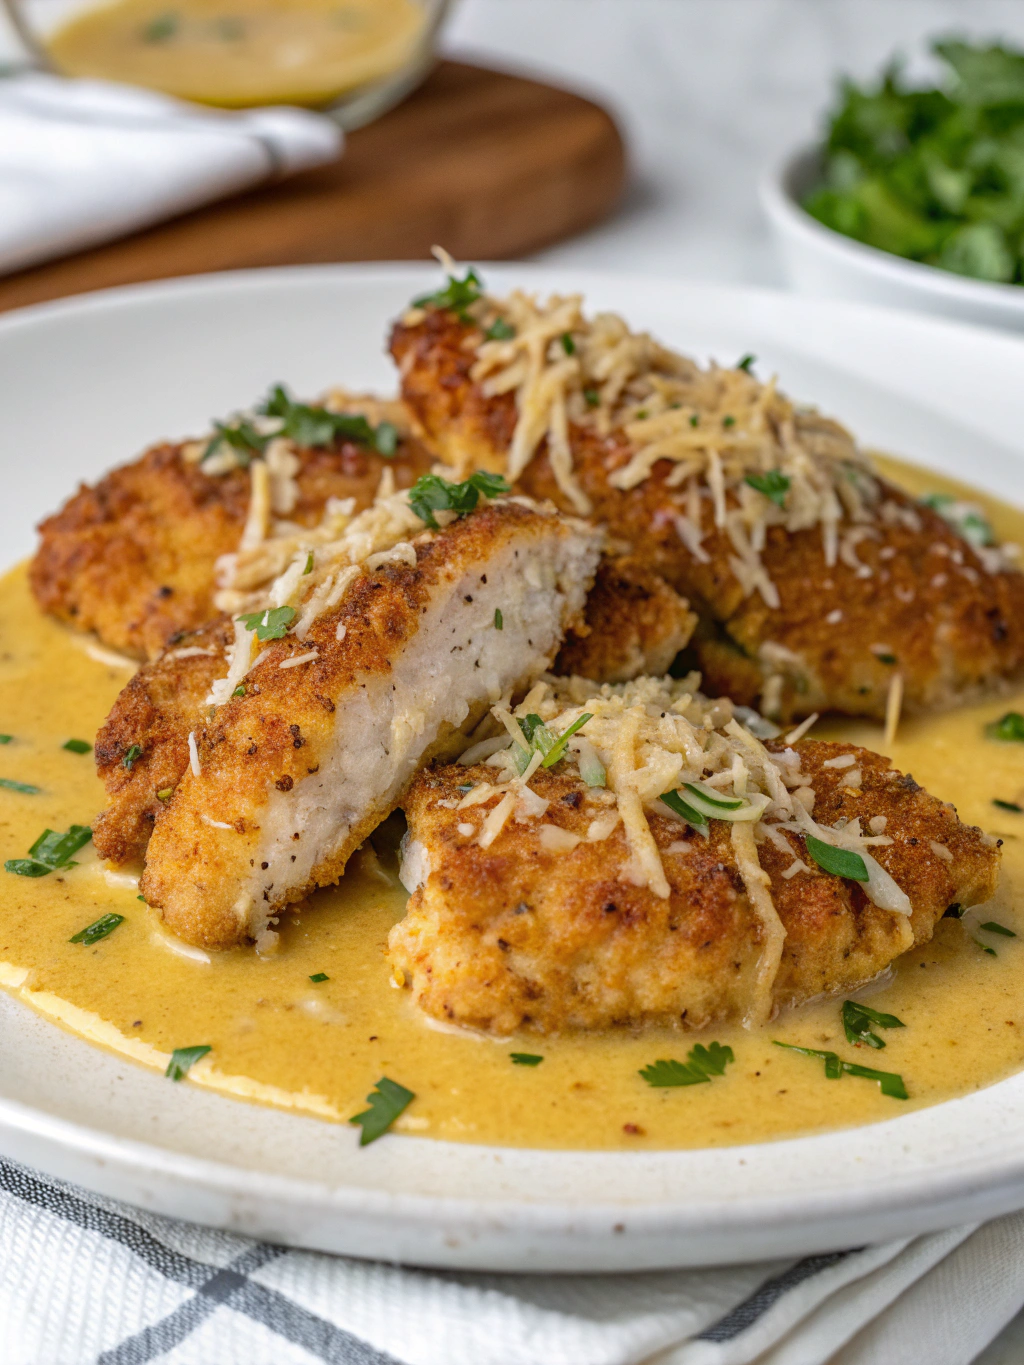
This golden, crispy parmesan-crusted chicken is elevated with a velvety garlic sauce that’s both rich and comforting. Perfect for weeknight dinners yet impressive enough for special occasions, this recipe delivers restaurant-quality flavor with simple home cooking techniques.
Easy Crispy Parmesan Chicken with Rich Garlic Sauce Recipe
There’s something magical about the combination of crispy, golden chicken coated in savory parmesan cheese and complemented by a rich, aromatic garlic sauce. This Crispy Parmesan Chicken with Rich Garlic Sauce has become one of my family’s most requested meals, bridging the gap between everyday comfort food and special occasion dining.
As we transition into fall, this dish provides that perfect warming comfort we all crave as the evenings grow cooler. The golden crust of the chicken reminds me of autumn leaves, while the creamy garlic sauce brings a richness that satisfies deeply on chilly nights.
THIS RECIPE:
- Creates perfectly crispy chicken without deep frying
- Features a restaurant-quality garlic cream sauce made simple
- Uses pantry staples with maximum flavor impact
- Can be prepped ahead for stress-free entertaining
| Recipe Details | |
|---|---|
| Prep Time | 15 minutes |
| Cook Time | 25 minutes |
| Total Time | 40 minutes |
| Servings | 4 portions |
| Yield | 4 chicken breasts with sauce |
This Crispy Parmesan Chicken with Rich Garlic Sauce strikes the perfect balance between simplicity and sophistication. The parmesan coating creates an incredible flavor-packed crust that seals in moisture, while the garlic sauce elevates the entire dish to restaurant-worthy status. Even kitchen novices can achieve spectacular results, making this recipe a true keeper for your collection.
Ingredients for Crispy Parmesan Chicken with Rich Garlic Sauce

The magic of this Crispy Parmesan Chicken with Rich Garlic Sauce begins with quality ingredients. While the recipe is forgiving, selecting the best components you can access and afford will elevate your results considerably. Fresh garlic and high-quality parmesan make a noticeable difference in the final flavor profile.
For the Crispy Parmesan Chicken:
- 4 boneless, skinless chicken breasts (about 6-8 oz each)
- 1 cup all-purpose flour
- 2 large eggs
- 2 tablespoons water
- 1½ cups freshly grated parmesan cheese
- 1 cup panko breadcrumbs
- 1 teaspoon garlic powder
- 1 teaspoon dried Italian herbs
- ½ teaspoon paprika
- ½ teaspoon salt
- ¼ teaspoon freshly ground black pepper
- 3 tablespoons olive oil for cooking
For the Rich Garlic Sauce:
- 2 tablespoons unsalted butter
- 6 garlic cloves, minced
- 1½ cups chicken broth
- 1 cup heavy cream
- ½ cup freshly grated parmesan cheese
- 1 tablespoon fresh lemon juice
- 2 teaspoons cornstarch mixed with 2 tablespoons cold water (optional thickener)
- Salt and freshly ground black pepper to taste
- 2 tablespoons fresh parsley, chopped
Key Ingredient Quality Tips:
For the best Crispy Parmesan Chicken with Rich Garlic Sauce, focus on these critical ingredients. Use freshly grated parmesan cheese rather than pre-packaged varieties, which often contain anti-caking agents that prevent proper melting. Select chicken breasts of similar size for even cooking, and if possible, gently pound them to an even thickness of about ¾-inch.
| Ingredient Category | Recommended Quality | Selection Tips |
|---|---|---|
| Chicken | Organic or free-range | Choose pieces of similar thickness; patting dry ensures better crust adhesion |
| Parmesan | Parmigiano-Reggiano | Grate fresh; avoid pre-shredded for best melting properties |
| Garlic | Fresh whole bulbs | Look for firm heads with tight skin; avoid sprouting cloves |
| Breadcrumbs | Japanese panko style | Provides superior crispiness compared to regular breadcrumbs |
| Cream | Heavy cream (36-40% fat) | Higher fat content creates silkier, more stable sauce |
How to Make Crispy Parmesan Chicken with Rich Garlic Sauce
Creating the perfect Crispy Parmesan Chicken with Rich Garlic Sauce is a two-part process that’s easier than you might think. We’ll start with preparing the crispy chicken, then focus on the luscious garlic sauce while the chicken rests. This approach ensures every component reaches its peak flavor and texture precisely when it’s time to serve.
Step 1: Prepare the chicken
- Pat the chicken breasts dry with paper towels and, if needed, gently pound to an even thickness of about ¾-inch.
- Set up your breading station with three shallow dishes:
- First dish: Combine flour with ¼ teaspoon each of salt and pepper
- Second dish: Whisk eggs with 2 tablespoons water
- Third dish: Mix parmesan cheese, panko breadcrumbs, garlic powder, Italian herbs, paprika, remaining salt and pepper
Step 2: Bread the chicken
- Dredge each chicken breast in flour, shaking off excess
- Dip into egg mixture, allowing excess to drip off
- Press firmly into the parmesan-panko mixture, ensuring even coating on all sides
- Place breaded chicken on a wire rack and let rest for 5-10 minutes to help the coating adhere
Step 3: Cook the chicken
- Heat olive oil in a large, heavy-bottomed skillet over medium heat until shimmering
- Add chicken breasts, being careful not to overcrowd (cook in batches if necessary)
- Cook for 5-7 minutes per side until golden brown and internal temperature reaches 165°F
- Transfer to a clean wire rack and rest for 5 minutes
Step 4: Make the garlic sauce
- In the same skillet (do not wipe clean), melt butter over medium heat
- Add minced garlic and cook for 30-45 seconds until fragrant but not brown
- Pour in chicken broth, scraping up any browned bits from the pan bottom
- Simmer until liquid is reduced by half, about 5-7 minutes
- Pour in heavy cream and bring to a gentle simmer
- Add parmesan cheese in batches, stirring until melted
- If desired, add cornstarch slurry for thicker sauce
- Finish with lemon juice, salt, and pepper to taste
Step 5: Serve
- Place chicken on plates and drizzle with garlic sauce
- Garnish with chopped parsley and additional parmesan if desired
Pro tip: Allow your breaded chicken to rest on a wire rack before cooking. This extra 5-10 minutes helps the coating set up properly, ensuring it adheres well during cooking for the crispiest possible result.
Tips for Making Crispy Parmesan Chicken with Rich Garlic Sauce
Mastering this Crispy Parmesan Chicken with Rich Garlic Sauce recipe comes down to understanding a few key techniques that make all the difference. Here’s my professional guidance to help you achieve perfect results every time.
• Don’t skip patting the chicken dry – moisture is the enemy of crispiness
• Use one hand for wet ingredients and one for dry during the breading process to avoid “club hand”
• Let the breaded chicken rest before cooking to help the coating adhere properly
• Maintain medium heat when cooking – too high will burn the cheese, too low won’t create a proper crust
| Technique | Recommendation | Why It Works |
|---|---|---|
| Chicken Thickness | Pound to uniform ¾-inch | Ensures even cooking without drying edges before center is done |
| Oil Temperature | 350°F (medium heat) | Hot enough for crisp exterior without burning cheese |
| Sauce Consistency | Reduced by ⅓ before adding cream | Creates concentrated flavor base and proper thickness |
| Cheese Addition | Add to sauce gradually while off heat | Prevents clumping and creates smooth emulsion |
The most critical step for perfect Crispy Parmesan Chicken is controlling moisture. After breading, allow the chicken to rest on a wire rack rather than a plate. This air circulation prevents the bottom from steaming and softening. Then when cooking, resist the urge to flip repeatedly – one turn is all you need for golden perfection on both sides.
For the sauce, the sequence matters significantly. Developing flavor begins with properly sautéed (not burned!) garlic, followed by deglazing with broth to capture all the fond (browned bits) from the chicken. This creates the foundational flavor that makes this Rich Garlic Sauce truly special.
Make-Ahead Instructions
Crispy Parmesan Chicken with Rich Garlic Sauce can be partially prepared in advance, making it perfect for entertaining or busy weeknights. Here’s how to break down the process:
You can bread the chicken up to 8 hours ahead of time. After coating with the parmesan mixture, place the breaded chicken on a wire rack set over a baking sheet, cover loosely with plastic wrap, and refrigerate. This not only saves time but actually improves adhesion of the coating.
The garlic sauce can be prepared up to 2 days ahead and refrigerated in an airtight container. When ready to serve, gently reheat on the stovetop over medium-low heat, adding a splash of cream if needed to restore the silky consistency. Whisk constantly to prevent separation.
If serving for a dinner party, you can cook the chicken just before guests arrive, then keep it warm in a 200°F oven for up to 30 minutes while finishing other dishes. Reheat the sauce separately and combine just before serving for the freshest presentation.
Pro tip: For the crispiest results when making ahead, slightly undercook the chicken by about 1 minute per side, then finish in a 375°F oven for 5-7 minutes just before serving. This maintains the juicy interior while refreshing the crispy exterior.
Storing Leftovers
Properly storing leftover Crispy Parmesan Chicken with Rich Garlic Sauce helps maintain both safety and quality. For best results, store the chicken and sauce separately to preserve the crispy texture.
Allow both components to cool completely before refrigerating, but don’t leave at room temperature for more than 2 hours. Transfer the chicken to an airtight container lined with paper towels to absorb excess moisture. Store the sauce separately in its own container with a piece of plastic wrap pressed directly onto the surface to prevent a skin from forming.
Properly stored leftovers will maintain quality for 3-4 days in the refrigerator. When reheating, the microwave will compromise the crispy texture, so instead, place the chicken on a wire rack over a baking sheet and warm in a 350°F oven for 10-12 minutes until heated through and re-crisped.
For the sauce, reheat gently in a small saucepan over medium-low heat, whisking frequently. If the sauce has thickened too much, add a tablespoon of cream or milk to restore its silky consistency.
Freezing Crispy Parmesan Chicken with Rich Garlic Sauce
While fresh is best for this recipe, you can freeze components with proper technique. The chicken and sauce should be frozen separately for optimal results.
To freeze the cooked chicken, allow it to cool completely, then place pieces on a parchment-lined baking sheet without touching and freeze until solid (about 2 hours). Once frozen, wrap each piece individually in plastic wrap, then aluminum foil, before placing in a freezer-safe bag labeled with the date. This method prevents freezer burn and maintains quality.
The sauce can be frozen in airtight containers or heavy-duty freezer bags with about ½-inch headspace to allow for expansion. For convenience, consider freezing in portion-sized containers.
Both components will maintain quality for up to 2 months in the freezer. To thaw, transfer to the refrigerator for 24 hours before reheating. For the chicken, unwrap completely and place on a wire rack over a baking sheet in a 375°F oven for 15-20 minutes until heated through and crispy. The sauce may separate slightly when thawed—simply reheat gently while whisking continuously to recombine.
Serving Suggestions
Crispy Parmesan Chicken with Rich Garlic Sauce shines when paired with complementary sides that balance its rich flavors. For a complete meal that impresses, consider these thoughtful accompaniments.
Light, bright vegetables create perfect contrast—try roasted asparagus, steamed broccolini, or a simple arugula salad with lemon vinaigrette. For starches, crusty artisan bread is perfect for soaking up extra sauce, while buttered egg noodles or creamy polenta create a luxurious base for the chicken.
For presentation, serve the chicken atop your chosen starch with sauce drizzled across rather than covering the crispy top completely. Garnish with finely chopped fresh herbs (parsley, chives, or basil), a sprinkle of lemon zest, and perhaps a few red pepper flakes for color and subtle heat.
Wine pairings elevate this dish beautifully—try a medium-bodied Chardonnay with subtle oak notes or a crisp Pinot Grigio to cut through the richness. For red wine lovers, a light-bodied Pinot Noir complements without overwhelming.
Pro tip: For an extra-special presentation, place a small bowl of additional warm garlic sauce on each plate for dipping, and sprinkle with a touch of freshly grated parmesan and cracked black pepper just before serving.
FAQ
Can I use chicken thighs instead of breasts for this Crispy Parmesan Chicken recipe?
Absolutely! Boneless, skinless chicken thighs work beautifully in this recipe and often result in juicier chicken. Adjust cooking time accordingly—thighs typically need 6-8 minutes per side depending on thickness. The internal temperature should still reach 165°F for food safety.
What can I substitute for heavy cream in the Rich Garlic Sauce?
While heavy cream provides the best richness and stability, you can substitute half-and-half with an additional ½ teaspoon cornstarch to help thicken. For a dairy-free option, full-fat coconut milk works surprisingly well with the garlic flavors, though it will impart a slight coconut taste.
My parmesan coating is falling off during cooking. What went wrong?
This typically happens for three reasons: 1) The chicken wasn’t dry enough before breading, 2) The coating wasn’t pressed firmly onto the chicken, or 3) The pan wasn’t hot enough when you added the chicken. Make sure to thoroughly pat the chicken dry, press the coating firmly, let it rest for 5-10 minutes before cooking, and ensure your pan is properly heated before adding the chicken.
Can I bake this Crispy Parmesan Chicken instead of pan-frying?
Yes! Preheat your oven to 425°F and place the breaded chicken on a wire rack set over a baking sheet. Spray or drizzle with olive oil and bake for 20-25 minutes until golden and internal temperature reaches 165°F. The texture won’t be identical to pan-fried, but it will still be delicious with less hands-on cooking.
How can I make this recipe gluten-free?
Replace all-purpose flour with a gluten-free all-purpose blend and use gluten-free panko breadcrumbs. Make sure your chicken broth is certified gluten-free as well. The results will be nearly indistinguishable from the original version when using high-quality substitutes.